Before you start:
If you are using some of the TRIC plugins for shipping, please make sure that you are running at least these versions to ensure that Swiipe checkout will work together with TRIC’s plugins.
Requirements:
TRIC GLS version 3.3.0
TRIC Pacsoft 3.2.0
If you are using any other plugins that affects your checkout, please either deactivate them or ensure they are compatible with Swiipe Checkout.
1. Log in
Log in to your Magento admin-panel.
To ensure Swiipe Checkout will work properly you need to have “Onepage Checkout” enabled. Go to “System” -> “Configuration” -> “Checkout” and select “Onepage Checkout” in your Magento admin-panel.
2. Before you begin the installation
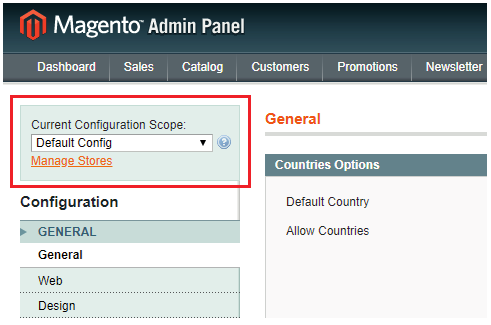
Ensure you are on the “Default Config” in the “Current Configuration Scope” section in the top left of the System Configuration page, before beginning the Swiipe plugin installation.
3.Disable cache, if necessary
Navigate to “System” -> “Cache Management”. Check if cache is enabled. If cache is enabled, disable it. Select all cache types by pressing “Select All” in the menu on the far left. Now select “Disable” in the “Actions” dropdown on the far right. Press the “Submit” button to save the cache settings.
Click now on “Flush Magento Cache” in the top right corner of the settings, once the page reloads then click on “Flush Cache Storage” and press “OK” to flush the cache.
4. Upload files
You have received a zip-file from Swiipe or downloaded it from the Swiipe portal. You need to unzip this zip-file.
Access your webshop via FTP access. You have received the login information from your hosting provider.
With your preferred FTP program, copy the content of the zip-file into your root directory (the root directory is where all Magento’s files are located).
5. Re-enable cache
ONLY if you disabled cache, you must re-enable them.
6. Log out and in again
Due to Magento’s own cache, it is necessary to log out of your admin-panel and log in again.
Now navigate to “System” -> “Configuration”. Once you are on the configuration page, you will have Swiipe settings available in the menu on the left.
7. Copy and save API Key
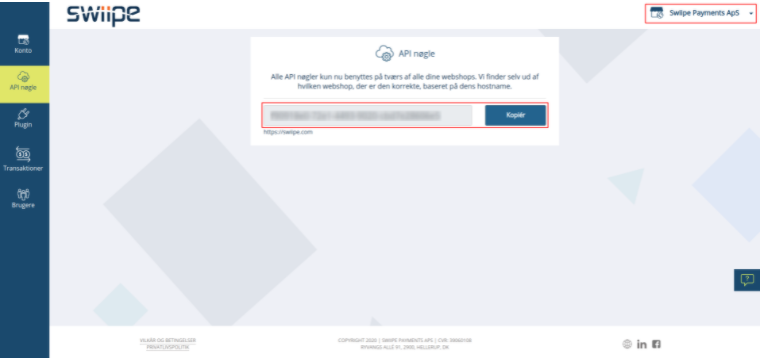
Open a new window and go to your Swiipe portal -> “API Keys”. Here you will find your API Key that you need to copy and save for later use. Remember to select the merchant in the drop-down in the top right of the screen.
(If you don't have a Swiipe account yet, see How to create a Swiipe account)
8. Activate Swiipe plugin
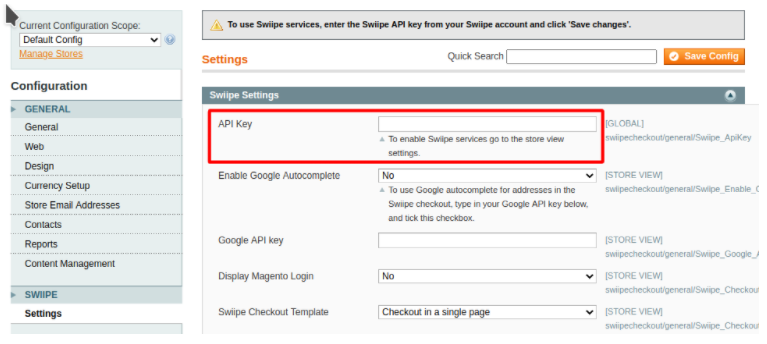
Return to your Magento admin-panel and click on “System”->”Configuration”, then click on “Swiipe settings” in the menu on the left side.
Here you can enter the saved API key.
Click on “Save Config” in the top right corner.
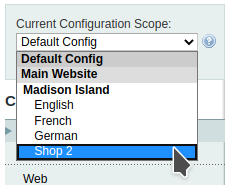
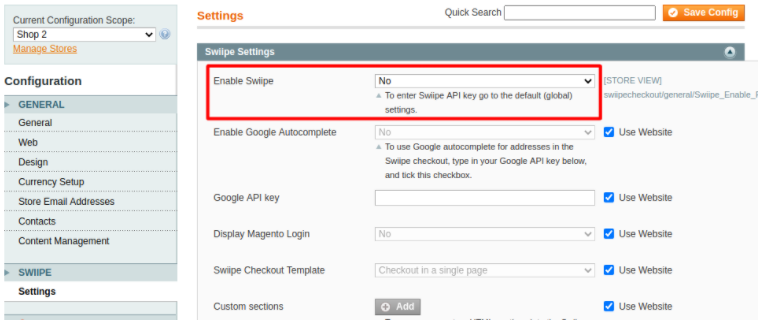
Change scope from "Default config" to the shop that needs to have Swiipe Checkout activated under "Current Configuration Scope" to the left.
Under "Enable Swiipe" select the value "Yes".
Press the "Save config" button in the top right corner.
The Swiipe plugin is now installed and can be seen on your webshop.



Kommentarer
0 kommentarer
Log ind for at kommentere.