*If you are using Shipmondo, simply skip step 1-6 in this guide as you already have a Google API that you just need to copy into our plugin.
1. Login to Google Cloud Console
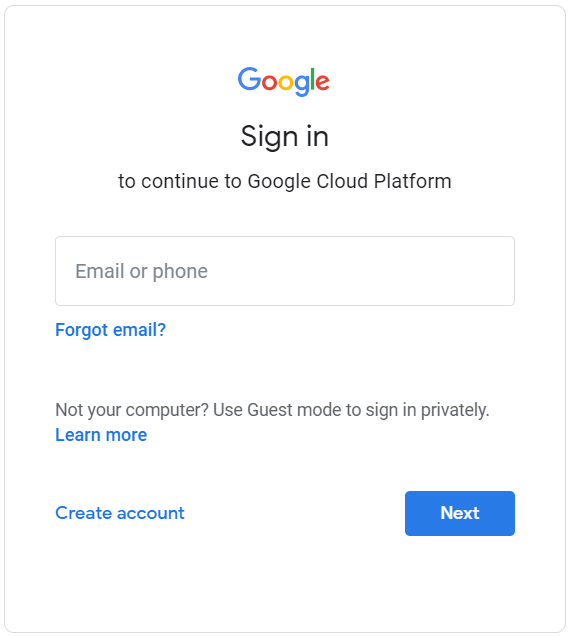
Go to Google Cloud Platform and login with your Google account (if you do not have one you will need to create an account as your first step).
2. Create a new project
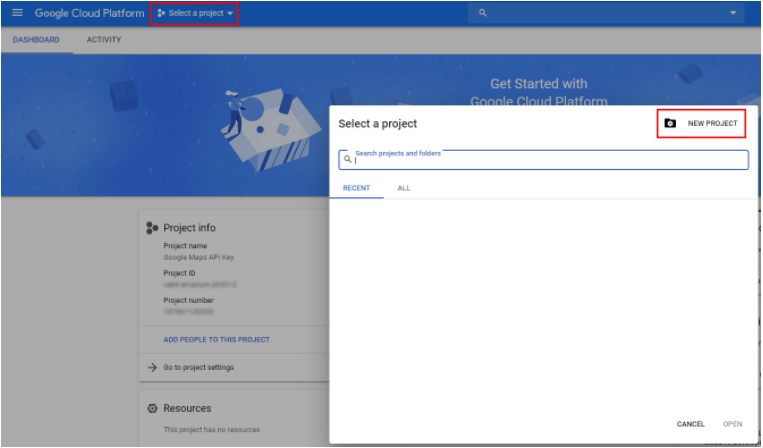
To create a new project, click on “Select a project” in the top main menu and click on “NEW PROJECT”.
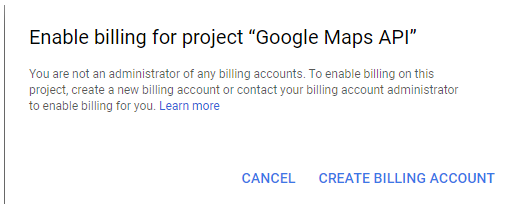
If you do not have a credit card associated to your Google account, you will most likely be asked to create a Google Billing Account. However, this does not mean that it will cost you any money to add and use Google autocomplete in your Swiipe checkout.
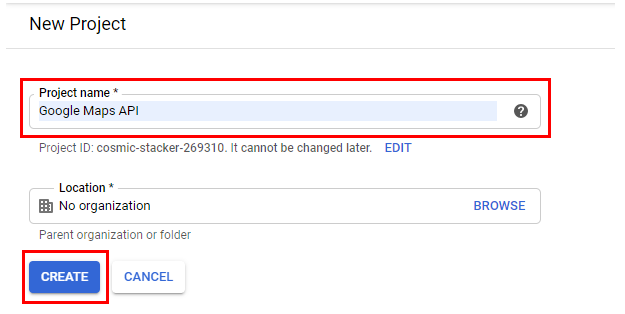
When you have created a Google Billing Account, simply go back to the set up of your new project: “Google Maps API” and click on “Create”.
3. Navigate to your new project
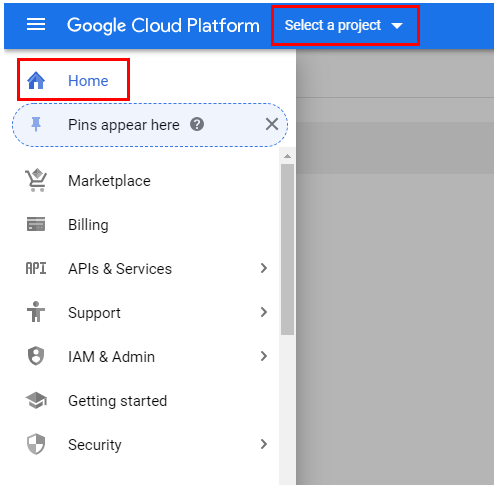
When your project is created, go to ”Home” in your navigation menu on the top left.
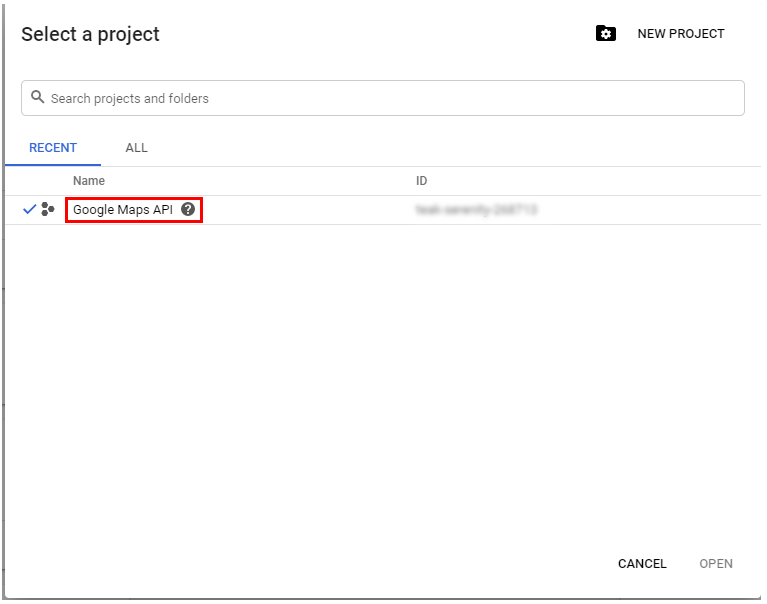
Under ”Select a project” choose your new project (Google Maps API).
4. Create your API key
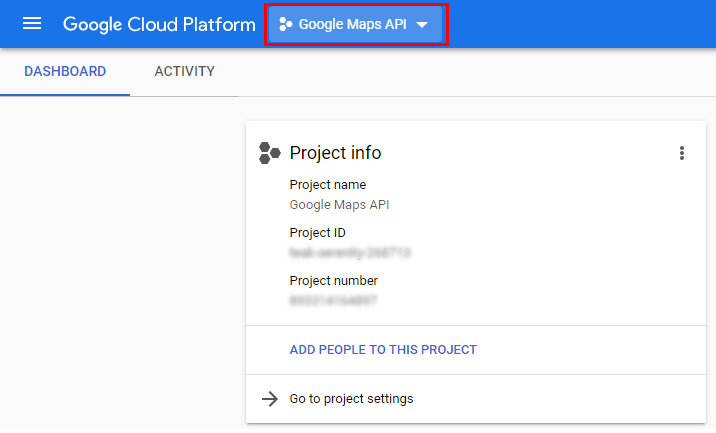
Make sure you are on the right project. The chosen project’s information can be seen in your Dashboard.
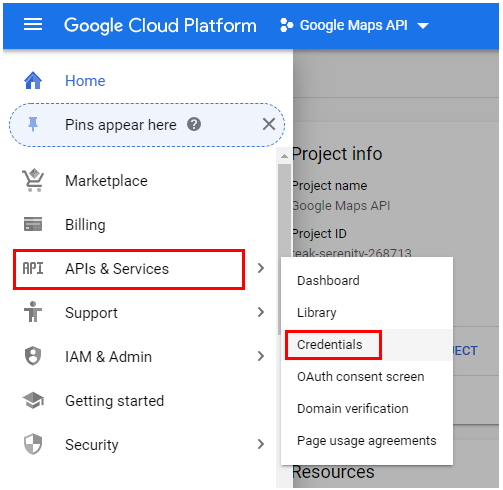
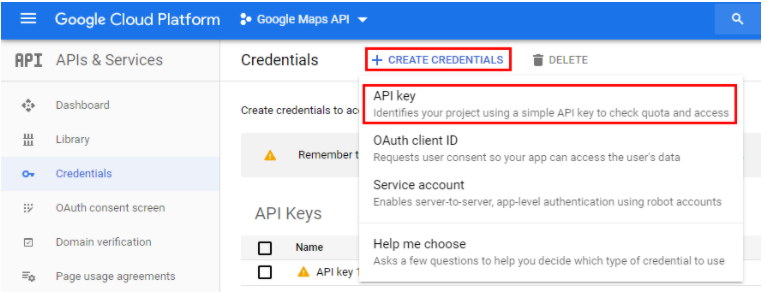
Now go you to "APIs & Services” ->” Credentials” which you can find in the navigation menu.
Click on “+Create Credentials”-> “API Key”.
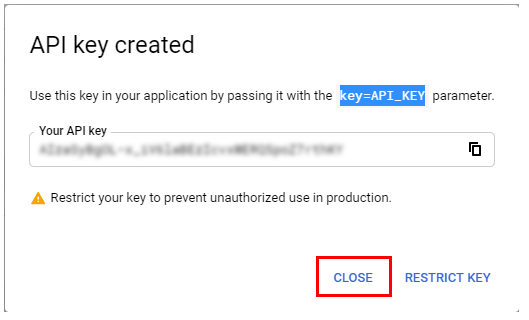
When the API Key is created you can now activate Google Maps to it. Copy and save the API key as you will need it for later. If you wish to retrict the use of your API key you can follow Google’s guide.
Click on “Close”.
5. Activate Google Maps for your Google API key
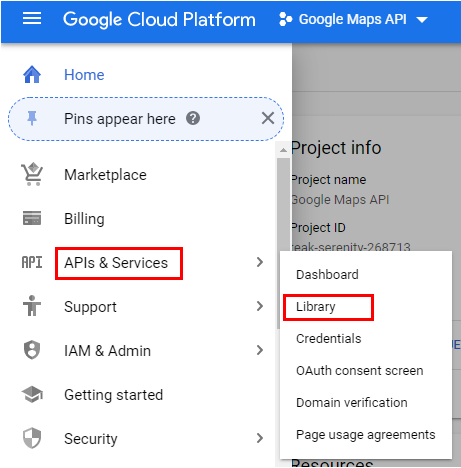
Go to "APIs & Services" -> "Library" in the navigation menu.
Click on "View All" from the "Maps" category.
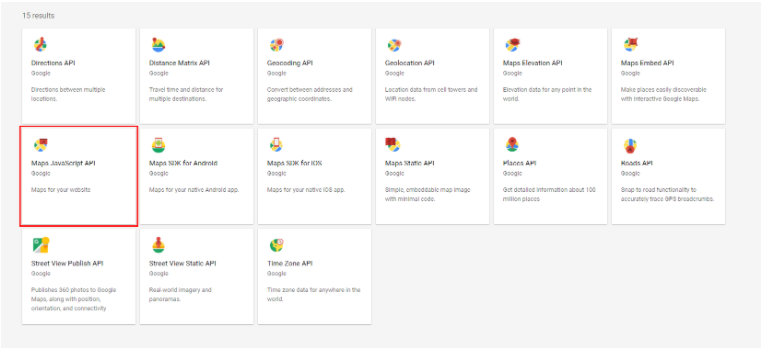
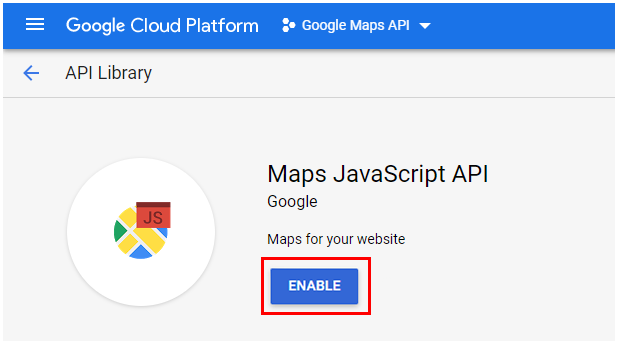
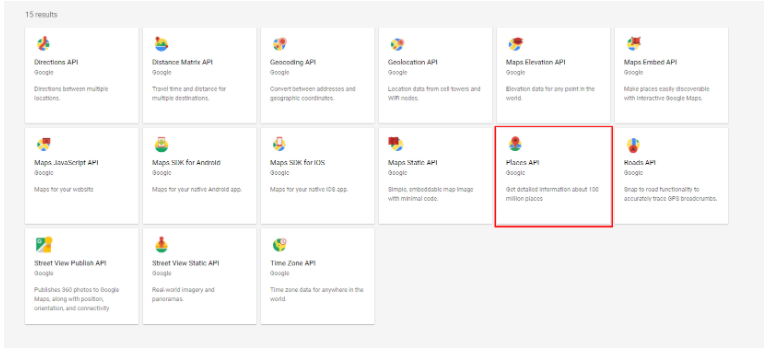
15 options will now appear. Click on the "Maps Javescript API" option.
Click ”Enable”.
6. Enable locations for your Google API key
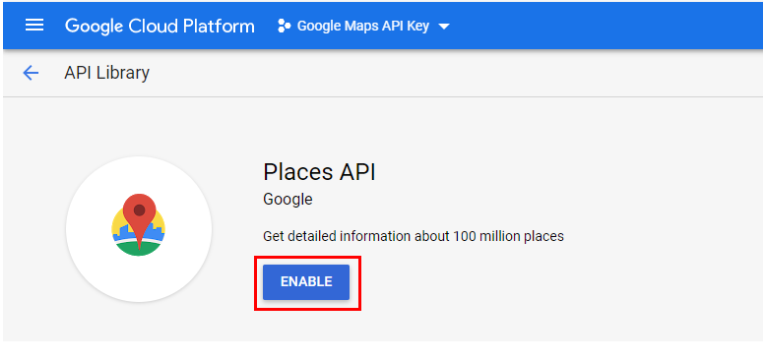
Find the "Places API" the same place as you found the "Maps Javascript API".
Click “Enable”.


Kommentarer
0 kommentarer
Log ind for at kommentere.